How to Clean a Guitar: Fretboard, Body, Strings and Hardware, Step by Step
Berklee-trained multi-instrumentalist Julian Reyes (MM) explains how to clean a guitar safely: the 60-second wipe-down, the deep clean at every string change, how to identify your fretboard wood and body finish first, cleaning steel, coated and nylon strings, electric hardware and pickups, and the products that permanently damage an instrument.
Updated
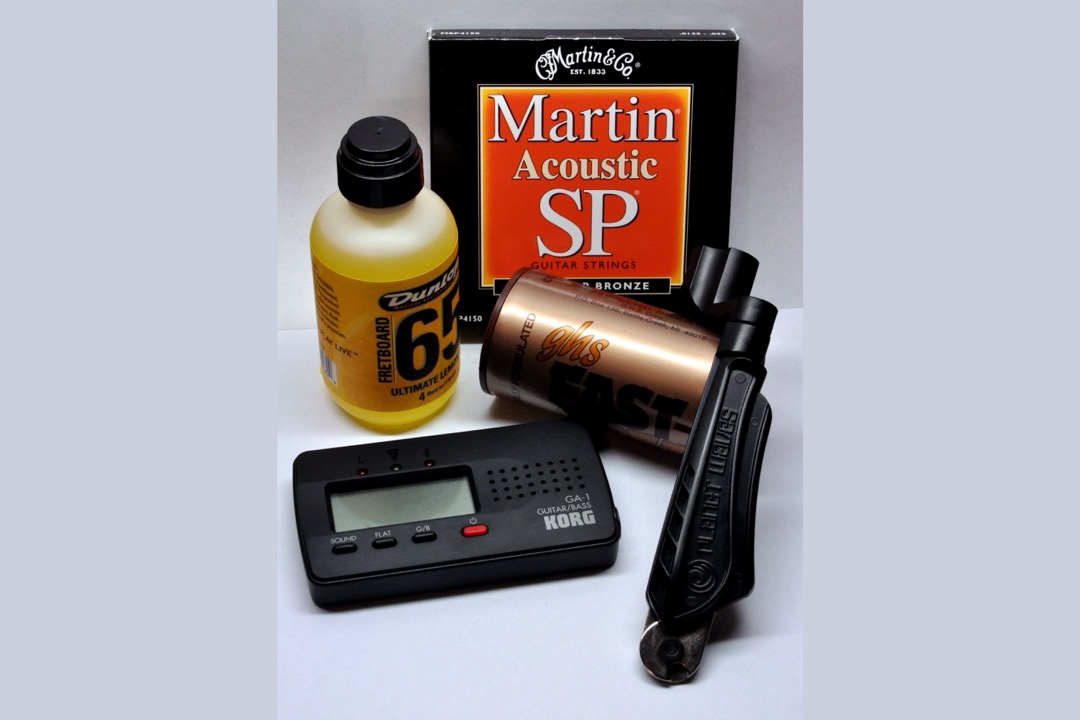
I spent several years buying and evaluating gear before I taught full time, which means I have had my hands on a great many guitars that were owned by people who loved them and cleaned them badly. The damage almost never comes from neglect. It comes from enthusiasm: furniture polish on a nitro finish, lemon oil on a maple board, alcohol wipes on the strings every week for a decade, a scouring pad taken to a fret because a video said steel wool works. Neglect leaves you with a dirty guitar, which is a ten-minute problem. Enthusiasm with the wrong product leaves you with a refinish that no longer bonds.
So this guide is built around one idea that I have never seen a maintenance article state plainly: cleaning a guitar is two separate jobs on two separate schedules, and confusing them is why people either do nothing or do too much. There is the quick wipe-down, which takes under a minute and happens after you play. And there is the deep clean, which takes twenty minutes and happens when the strings come off. Get those two habits right and you never need to think about it again.
Before any of that, though, you have to know what your guitar is made of. The single most important sentence in this article is that the correct cleaning method depends entirely on your fretboard wood and your body finish, and the products that are perfect for one are destructive on another.
Quick Wipe-Down vs. Deep Clean, and Which One You Need
The quick wipe-down is preventative. Your hands leave sweat, skin oil and salt on the strings and the neck every time you play, and that residue is mildly corrosive. Left alone, it eats the plating off your strings, dulls the finish where your forearm rests, and slowly compacts into the hard dark ridge you find at the fret ends of a well-loved guitar. Thirty to sixty seconds with a dry cloth after each session removes essentially all of it. This is the highest-return habit in guitar ownership and almost nobody does it.
The deep clean is corrective. It removes what has already built up: the grime between the frets, the tarnish on the hardware, the fingerprint haze on the back of the neck, the dust in a pickup cavity. It needs the strings off, which is why the right time to do it is during a string change. If you are already changing strings on a sensible schedule, the deep clean rides along for free. Our guide on how to restring a guitar covers the string change itself, and step three of that process is the exposed fretboard moment this article is about.
The reason to keep the two jobs distinct is simple. Wipe-down products and deep-clean products are not the same, and neither are the risks. A dry cloth on a nitro finish is harmless every single day. A polish on that same finish every single day will eventually cut through it.
What You Actually Need
I am deliberately listing materials by task rather than by brand, because the brand matters much less than getting the category right.
- Two or three microfiber cloths. Keep them separate and label them if you have to: one for the body, one for the strings and fretboard. Microfiber lifts dust rather than pushing it around, and unlike an old t-shirt it will not have a seam, a button, or embedded grit.
- A guitar body polish matched to your finish. Gloss and satin want different products. Buy from an instrument-care brand, not a hardware store, because instrument polishes are formulated without silicone and ammonia and household products usually are not.
- A fretboard conditioner, only if your board is unfinished. This is oil for rosewood, ebony and pau ferro, and it is used twice a year at most.
- A plastic scraper, or honestly just the edge of an expired card. This is the safe first move on caked fretboard grime and it works better than most people expect.
- A soft brush. An old toothbrush with the bristles trimmed short, or a small paintbrush, for the gaps around a bridge, under a tailpiece, and around tuner buttons.
- Optional: 0000-grade steel wool for a fretboard deep clean, with the specific warnings I give below.
- Optional: electrical contact cleaner if you have an electric with a crackling volume pot.
A boxed guitar maintenance kit will contain a cloth, body polish and fretboard oil for less than the cost of a string set, and for most players that is the whole shopping list. Two things I would add separately: a decent clip-on tuner, because you will be retuning after every deep clean and a good one makes that painless (our best guitar tuner roundup covers the accuracy differences that actually matter), and a handful of fresh guitar picks, since a worn pick with a rough edge scuffs a finish and drags on strings.
Identify Your Fretboard and Your Finish First
This is the step people skip, and it is the step that determines whether the next twenty minutes improve your guitar or damage it. Work out both answers before you open a bottle.
| What you have | How to tell | Safe to use | Never use |
|---|---|---|---|
| Maple fretboard (finished or lacquered) | Pale, creamy or blonde, and glossy or satin-smooth to the touch. Feels sealed, like the back of the neck. Grain sits under a clear layer | Dry cloth, or a cloth barely damp with water. Guitar body polish sparingly | Any fretboard oil or lemon oil. Steel wool. Solvents |
| Rosewood, ebony or pau ferro (unfinished) | Dark brown to near-black, open-pored, feels like bare wood. Looks slightly dry when clean | Dry cloth, plastic scraper, fretboard conditioner twice a year, 0000 steel wool with pickups taped | Water soaking. Alcohol. Household polish. Anything applied heavily |
| Gloss or polyurethane body finish | Mirror-shiny, hard, thick-feeling. Standard on most affordable and mid-range guitars | Dry cloth, guitar polish for gloss finishes, light water on a cloth for stubborn marks | Abrasive compounds unless you are correcting swirls deliberately. Ammonia cleaners |
| Satin or matte body finish | Low sheen, slightly velvety, no reflection. Common on modern acoustics and satin-neck electrics | Dry cloth. A dedicated matte or satin instrument cleaner only | Gloss polish or any wax. It will burnish the satin into shiny patches you cannot undo |
| Nitrocellulose lacquer | Thin, warm-toned, often slightly checked with fine hairlines. Vintage and higher-end instruments. Smells faintly of lacquer inside the case | Dry cloth. Nitro-safe instrument polish only | Isopropyl alcohol. Silicone polish. Anything with a solvent. Rubber and vinyl stands left in contact |
Fretboard woods
Unfinished boards are the common case: rosewood, ebony and pau ferro are all left bare, they absorb oil, and they are the boards that benefit from conditioning. Maple is the exception, and it is almost always finished, because bare maple would stain visibly from the first hour of play. Since the board is sealed, oil cannot penetrate it. It just sits there, attracts dust, and makes the neck feel tacky. Lemon oil on a finished maple board is the most frequent well-meaning mistake I see.
If you are not certain which wood you have, put a single drop of water on the board in an inconspicuous spot near the nut. On an unfinished board it darkens the wood immediately and soaks in. On a finished board it beads. Wipe it off either way. If you want to know the board better while you are down there, our guitar fretboard chart maps every note position and is a useful thing to have open while the strings are off and you can actually see the wood.
Body finishes
The finish rule that catches the most people is satin. Martin, among others, warns explicitly that polishing a satin instrument will burnish it to a gloss in the areas you rub hardest, and that is not reversible without a refinish. Satin finishes get a dry cloth and nothing else, or a cleaner specifically labeled for matte and satin.
Nitrocellulose is the other one to be careful with. It is thinner and softer than poly, it stays chemically active for years, and it reacts to solvents and to certain plastics and rubbers. A nitro guitar left resting on a cheap foam stand will show a permanent print of that stand within months.
The After-Every-Session Wipe-Down (60 Seconds)
Do this every time you put the guitar down. It is the single habit that makes deep cleans rare and easy.
- Strings first. Run a dry cloth over and under each string along the full length of the neck. The easiest technique is to pinch the string between the cloth and your thumb, and slide from the nut to the bridge in one pass, then repeat on the next string. Six passes, about twenty seconds.
- Back of the neck. Wipe from the nut to the heel. This is where sweat sits and where a satin neck gets a sticky patch.
- The forearm area and the top. One pass on the upper bout where your arm rests, one on the soundboard or body face where the pick and your fingers land.
- Put it away or stand it up. A case or a padded stand, not leaning against a radiator or in a sunny window.
That is it. No product, no polish, nothing wet. The value here is purely in the frequency: sweat that has been sitting on a string for one hour wipes off, and sweat that has been sitting there for two weeks has already begun corroding the winding. Doing this reliably can double the useful life of a string set, which is a real saving whether you play acoustic strings or electric sets.
The Deep Clean, Done at Every String Change
Everything below happens with the strings off. Support the neck on a rolled towel or a neck rest so the guitar sits stable on its back, and give yourself twenty minutes.
Cleaning the fretboard
Start with the least aggressive method and escalate only if you need to.
First, a dry cloth. Work it into the space between each pair of frets, pressing into the corners where the fret meets the wood. On a board that gets wiped after sessions, this is often all it needs.
If there is a hard ridge of grime at the fret ends, which you will feel as a slight step under a fingernail, go to a plastic scraper or the edge of an old card. Hold it at a shallow angle and push the deposit toward yourself along the wood. It comes off in dry flakes. This is safer than any abrasive, it works on every board type including finished maple, and it should always be your first escalation.
Only if the board is unfinished and genuinely filthy, consider 0000-grade steel wool, which is the very finest grade. Two warnings, both non-negotiable. First, mask your pickups with painter’s tape before you touch steel wool to an electric, because the wool sheds microscopic steel fibers, your pickup magnets will grab them, and picking them out afterwards is a miserable job with tweezers. Second, stay off finished maple entirely and stay off the body finish. On bare rosewood or ebony, rub lightly along the grain, not across it, and stop as soon as the wood looks clean. Vacuum or blow the debris away and wipe the board down before you go near the pickups again. If any of that makes you uneasy, skip it. The scraper plus a cloth gets you ninety percent of the result with none of the risk.
Then condition, if the board is unfinished and looks dry. A small amount of fretboard conditioner on the cloth, worked along the board, left for a minute, then wiped off completely. Twice a year is the outer limit. On maple, skip this step entirely.
Finally, the frets themselves. If they are dull, a light pass with a cloth restores most of the shine. Serious fret polishing with abrasives and fret guards is a setup job rather than a cleaning job, and it is not something to do casually.
Cleaning and polishing the body
Dust the whole body with a dry cloth before you introduce any product, because polishing over grit is how you put swirl marks into a finish.
On gloss or poly, apply polish to the cloth rather than to the guitar, work in overlapping straight passes rather than circles, and buff off with a second clean cloth before it dries. Attack fingerprints and belt haze on the back the same way.
On satin or matte, use a dry cloth or a dedicated satin cleaner and nothing else. This is the Martin warning worth repeating: polish will make a satin body go shiny in patches, and those patches do not come back.
On nitrocellulose, use only polish labeled nitro-safe, apply it sparingly, and keep solvents nowhere near it.
Around hardware and inside the soundhole, use the brush. On an acoustic, tip the guitar and shake the loose dust out of the soundhole rather than pushing cloth in, and never let liquid run inside. A pool of polish on the underside of the top, where you cannot reach it, is a permanent stain.
Cleaning steel strings
If you are deep cleaning during a string change and the strings are coming off anyway, skip this. It applies to mid-life strings you want to extend.
Pinch each string in a dry cloth and slide from nut to bridge, then reverse. Get the underside, which is where grime accumulates against the fretboard and where you cannot see it. For strings that feel gritty, a purpose-made string cleaner and lubricant on the cloth will pull off more, and it is formulated not to wick into the board the way alcohol does. Wipe any excess off the fretboard immediately.
Do not soak strings in anything, and do not use alcohol. It works in the short term and costs you fretboard moisture in the long term.
Cleaning coated strings
Coated sets from Elixir, DR and La Bella carry a polymer layer over the winding, and that coating is the entire product. Anything abrasive removes it, at which point you have an ordinary string that you paid a premium for.
So: a dry cloth, light pressure, straight passes. No steel wool, no abrasive cleaners, no vigorous scrubbing, and no solvent-based string cleaners. Coated strings are designed to resist the corrosion you would otherwise be cleaning off, so they need less attention rather than more. If yours have gone dull despite the coating, it is usually the coating wearing through at the fret contact points, and no amount of cleaning brings that back.
Cleaning nylon and classical strings
Nylon trebles are plain monofilament and essentially inert. They pick up almost no grime and need nothing but a dry wipe. The wound basses on a classical set are the part that ages, usually silver-plated copper over a nylon floss core, and they tarnish and go dull faster than most players expect. A dry cloth after playing helps; abrasives will strip the plating and finish them off early.
The bigger cleaning consideration on a classical guitar is the instrument rather than the strings. Many are finished in French polish, a shellac finish that is thin, beautiful and dissolved by alcohol. Treat a French-polished top as dry-cloth-only unless you know for certain what the finish is. If you are still deciding between nylon and steel and want the full picture on how differently the two instruments are built and maintained, our classical vs acoustic guitar comparison lays it out.
Hardware, Tuners and Bridge
Hardware is where a guitar visibly ages, and it takes about three minutes.
Tuning machines. Wipe the buttons and the housings with a dry cloth. Use the brush to get dust out of the gap between the post and the headstock face. If a tuner feels stiff or gritty, that is a lubrication question rather than a cleaning one, and it wants a single tiny drop of light machine oil on the gear where it meets the worm, not a spray. Check the small screw on the back of each button, since these back off over time and a loose button feels like a failing tuner. While you are there, it is worth a quick check that everything still holds pitch properly, which our guide on how to tune a guitar covers in more depth than most players have ever bothered with.
Bridge and saddle. On an electric, dust collects in the saddle slots and around the intonation screws, and the brush handles it. On an acoustic with the strings off, wipe around the saddle and check the bridge pin holes are clear. Do not lubricate saddles.
Chrome, nickel and gold plating. A dry cloth for all of them. Nickel tarnishes and gold plating is thin and wears through, so resist the urge to bring either back with metal polish, because you will simply take the plating off faster. Light tarnish on a bridge is character rather than a fault.
Strap buttons and jack plates. Check tightness while you are cleaning. A strap button that has worked loose is the cheapest disaster in guitar ownership to prevent and the most expensive to ignore.
Electric Guitar Extras: Pots, Jack, Pickups and Pickguard
Electrics have four maintenance points that no acoustic-focused cleaning guide covers, and every one of them shows up as a fault that players misdiagnose as something worse.
A crackling or scratchy volume or tone pot. That noise is dust and oxidation on the carbon track inside the potentiometer, and it is fixable rather than terminal. Use a proper electrical contact cleaner made for potentiometers, not WD-40 and not a general degreaser. Access is through the pot’s own casing opening: a short burst, then rotate the knob through its full sweep twenty or thirty times to work the cleaner across the track, and leave it to dry before you plug in. Most crackle disappears entirely. If it comes back within weeks, the pot is worn and wants replacing, which is an inexpensive part.
An intermittent output jack. If the signal cuts when you nudge the cable, the usual causes are a loose jack nut, oxidation on the contacts, or the contact spring having lost tension. Clean the contacts with a cotton bud and contact cleaner, then check the nut. Do not overtighten it, because on many guitars that twists the internal wiring.
Dust in the pickup cavity. Under the strings, around the pickup rings and along the pole pieces, dust and pick debris accumulate. Use the soft brush and a puff of air rather than a cloth, so nothing gets pushed down between the pickup and the body. Never let liquid near a pickup. Pole pieces get a dry wipe only, and if a magnet has collected steel filings, a piece of tape pressed on and lifted takes them off cleanly. Different pickup types sit at different heights and expose different amounts of metal, and if you are curious why your two guitars collect debris so differently, our humbucker vs single coil explainer covers the construction differences.
A pickguard holding static. Plastic pickguards attract dust electrostatically, particularly in dry weather, and wiping them with a dry cloth makes it worse by charging them further. A cloth very slightly dampened with water discharges the static and picks the dust up. Dry it straight after. This is also the one place where a rougher cloth is a bad idea, because pickguard plastic scratches more easily than the body finish next to it.
What Never to Use on a Guitar, and Why
Each item here I have personally seen damage an instrument.
Isopropyl alcohol. Two separate failure modes, and it is worth knowing both. On the finish, alcohol is a solvent that cuts straight through nitrocellulose lacquer and French polish, hazing, softening or lifting them on contact. On the strings, where players most often reach for it, the excess runs down the string and wicks into an unfinished rosewood or ebony fretboard, and repeated use over months and years dries the wood out, grays it, and shrinks it back from the fret ends until the fret ends feel sharp. It is the only product on this list that can wreck both your finish and your fretboard depending on where you apply it.
Household glass and furniture cleaners. Glass cleaners are typically ammonia-based, and ammonia attacks finishes and clouds plastic parts. Furniture sprays are usually silicone-based, which brings us to the worst offender.
Silicone polishes. These look magnificent for a week. Silicone soaks into wood and into the microscopic pores of a finish, it does not come out with any solvent, and it is impossible to fully remove. The consequence is that no future finish, glue or touch-up will bond to that surface. A luthier asked to repair or refinish a silicone-contaminated guitar will either refuse or charge for the extra work of trying, and they can usually tell within seconds of looking at it. This is the one mistake here that is genuinely permanent.
Coarse steel wool. Grades 000 and coarser will scratch a fretboard and destroy a finish. Only 0000 has any place near a guitar, only on an unfinished board, and only with the pickups taped over.
Water pooling into a soundhole or a pickup cavity. A slightly damp cloth is fine. Liquid that runs somewhere you cannot reach is not. Inside an acoustic it stains the bracing and the underside of the top; inside a control cavity it corrodes solder joints.
Lemon oil on a finished maple board. It cannot penetrate a sealed surface, so it sits on top, goes tacky, and collects everything you touch. Many products sold as lemon oil also contain solvents and are not lemon oil in any meaningful sense.
Anything abrasive on coated strings. The coating is what you paid for.
How Often to Clean a Guitar
| Task | How often |
|---|---|
| Wipe strings, neck and body with a dry cloth | After every session |
| Wipe the body face and check hardware is tight | Weekly, or whenever you notice marks |
| Deep clean the fretboard, polish the body, brush the hardware | At every string change |
| Condition an unfinished fretboard | Twice a year at most, less in a humid climate |
| Contact cleaner on pots and jack | Only when something crackles |
| Polish a satin finish, oil a maple board, use alcohol anywhere | Never |
Two notes on that table. The string-change row means the deep clean happens roughly every three to four weeks for a daily player and every few months for a weekend player, which is exactly the right cadence in both cases, and it is why tying it to the string change works so well. And the last row is deliberate: those are not rare procedures, they are things to never do.
A Clean Guitar Is a Guitar You Pick Up
The thing I noticed teaching, more than any tonal argument, is behavioral. Students with clean instruments practice more. A guitar with a grimy neck, sticky strings and a dusty top is subtly unpleasant to handle, and that friction is enough to make you reach for it a little less often, and then a little less often again. A guitar that feels fresh under your hands invites you to sit down with it.
So keep it simple. A dry cloth after every session, a proper clean when the strings come off, and never put a product on the instrument without knowing what the finish is. That is genuinely the whole discipline, and it costs you about a minute a day.
If the cleaning is done and the instrument still fights you, the problem is the instrument rather than the maintenance. Our guides to the best acoustic guitars and the best electric guitars cover instruments that arrive playable and stay that way, and the best beginner acoustic guitars roundup is where I would send anyone whose first guitar has become the reason they stopped practising. And when the strings do come off, our restringing walkthrough picks up exactly where this article’s deep clean leaves off. If you are also thinking about moving to a different string gauge while you are at it, run the numbers through our free guitar string tension calculator before you commit, because a heavier set changes the load on the neck as well as the feel under your fingers.
Frequently Asked Questions
Can I use isopropyl alcohol to clean my guitar?
How often should I oil my guitar's fretboard?
What is the best thing to clean a guitar with?
Do I need to take the strings off to clean my guitar?
Why is my fretboard gray or dusty looking, and how do I fix it?
Related Articles
How to Restring a Guitar: Acoustic, Electric and Classical, Step by Step
accessories-care
8 Best Acoustic Guitar Strings of 2026 (Every Player & Budget)
accessories-care
8 Best Electric Guitar Strings of 2026 (Every Style & Budget)
accessories-care
9 Best Guitar Picks of 2026 (Beginner, Acoustic, Metal, Jazz & Bass)
accessories-care
Guitar String Notes Explained: The 6 Open Strings (E-A-D-G-B-E)
accessories-care
About the Reviewer

Julian Reyes, MM, Berklee
M.M. Performance, Berklee College of Music
Julian Reyes is a multi-instrumentalist with a Master of Music from Berklee College of Music and over a decade gigging on guitar, bass, and keys. Before founding House of Octave, he spent years as a gear buyer for an independent music retailer, evaluating hundreds of instruments and audio products for the sales floor. He started House of Octave in 2026 to give players honest, hands-on reviews — judged by how gear actually sounds and holds up on stage and in the studio, not by spec sheets or sponsorships.