Guitar Chords for Beginners: The First 8 Chords to Learn (and How)
Berklee-trained teacher Julian Reyes (MM) explains the first 8 guitar chords every beginner should learn, why they come in that order, how to read a chord diagram, and a 4-week practice plan to switch between them cleanly.
Updated
A student once told me she had “tried guitar” twice before and quit both times. When I asked what happened, the answer was the same both times: someone handed her a chart of fifteen chords, she couldn’t make any of them ring out, and she decided she wasn’t musical. She was wrong about that. What she’d actually run into is the single most common way beginners get stalled — too many chords, in the wrong order, with no explanation of why her fingers buzzed and ached. Six weeks later she was strumming through three songs.
I’ve taught hundreds of first lessons, and the path that works is almost embarrassingly simple. There are eight open chords that, learned in the right sequence, unlock a large share of every campfire song, pop hit, and folk standard you’ve ever heard. This guide gives you those eight chords, the exact order I teach them in, how to read the diagrams, and — just as important — how to practice so the changes between chords stop feeling impossible. If you are still choosing an instrument to learn on, our guide to the best beginner electric guitars covers what to look for, and the wider guitars category lays out acoustic and electric options side by side. Once you have a guitar in your hands, this is where to start.
How to Read a Guitar Chord Diagram
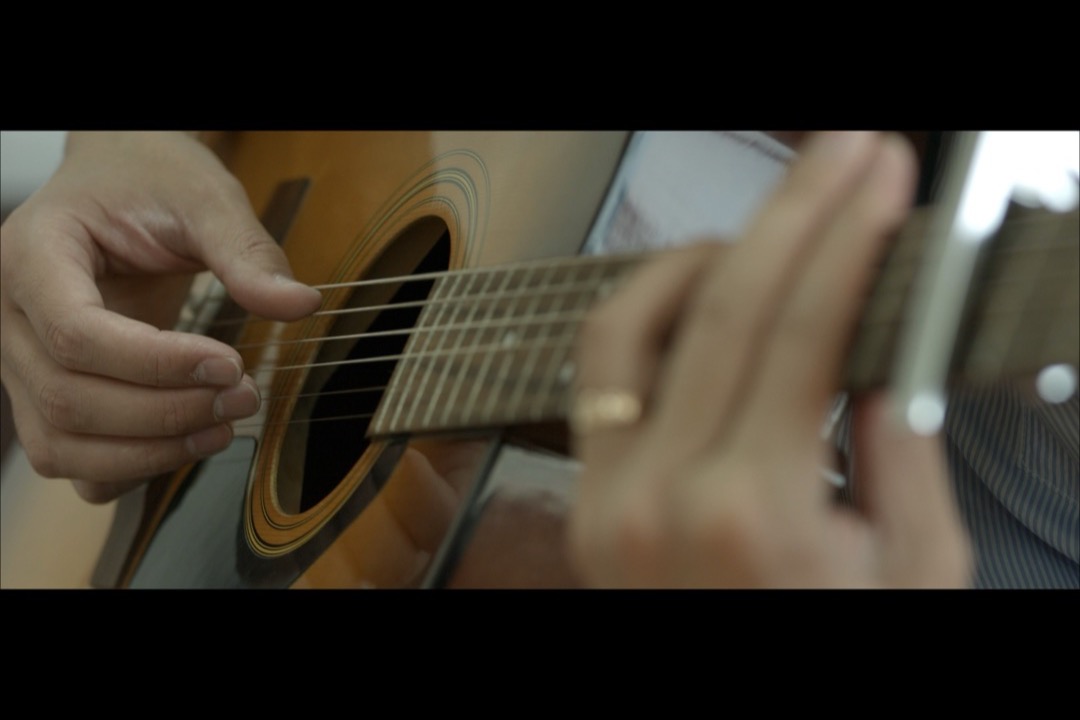
Before a single chord, you need to read the map. A chord diagram (also called a chord box or chord chart) is a simple grid that shows you exactly where to put your fingers. It trips beginners up for about ninety seconds and then becomes second nature.
Picture your guitar standing up vertically in front of you, facing you, as if it were hanging on a wall:
- The six vertical lines are the strings. The leftmost line is the thickest, lowest-pitched string (low E); the rightmost is the thinnest, highest-pitched string (high E).
- The horizontal lines are the metal frets, dividing the neck into segments. The thick line at the very top is the nut — the top end of the neck.
- A dot on the grid means “press this string down at this fret.”
- A number inside or beside the dot tells you which finger to use.
- An O above a string means play it open (strum it, but don’t fret it).
- An X above a string means don’t play that string at all — mute it or skip it.
Your fretting-hand fingers are numbered, and this numbering is universal across every chart you will ever read:
| Finger | Number |
|---|---|
| Index | 1 |
| Middle | 2 |
| Ring | 3 |
| Pinky | 4 |
Throughout this guide I’ll write chords as simple text grids you can read at a glance. Here’s E minor, your very first chord, so you can practice reading the format:
E minor (Em)
e |---0---  (open)
B |---0---  (open)
G |---0---  (open)
D |---2---  (finger 2)
A |---2---  (finger 1)
E |---0---  (open)
That’s it — two fingers, on the fourth and fifth strings, both at the second fret, and you strum all six strings. Read across each line: string name on the left, fret number in the middle. Everything that follows uses this same layout.
The First 8 Chords, in the Order I Teach Them
These eight chords are not a random greatest-hits list. The order is deliberate: each chord either reuses a shape your hand already knows or adds exactly one new physical skill — a third finger, a wider stretch, or a string you have to deliberately avoid. Learning them in this sequence means you’re never facing more than one new challenge at a time, which is the whole secret to not getting overwhelmed.
1. E Minor (Em) — Two Fingers, All Six Strings
Em
e |---0---
B |---0---
G |---0---
D |---2---  (finger 2)
A |---2---  (finger 1)
E |---0---
Em is the easiest chord on the guitar and the one I start every beginner on. Two fingers sit side by side, you strum everything, and there’s nothing to mute. Within a few minutes you’ll have a full, ringing, genuinely musical sound — and that early win matters more than you’d think. It’s the difference between “I can do this” and quitting.
2. A Minor (Am) — Adding a Third Finger
Am
e |---0---
B |---1---  (finger 1)
G |---2---  (finger 2)
D |---2---  (finger 3)
A |---0---
E |---X---  (don't play)
Am keeps the cluster shape your hand learned on Em but adds your index finger and asks you to skip the low E string. This is your first introduction to muting a string you don’t want — strum from the A string down, not from the low E. Em and Am sound great together, so practice switching between just these two before adding anything else.
3. E Major — One Finger Away from Em
E
e |---0---
B |---0---
G |---1---  (finger 1)
D |---2---  (finger 3)
A |---2---  (finger 2)
E |---0---
If you can play Em, you can play E major — it’s the identical shape with one finger added on the third string. Notice how the curriculum is building: you’re not memorizing a brand-new hand position, you’re modifying one you already own. E major is a bright, powerful chord and the foundation of countless blues and rock songs.
4. A Major — The Three-in-a-Row Squeeze
A
e |---0---
B |---2---  (finger 3)
G |---2---  (finger 2)
D |---2---  (finger 1)
A |---0---
E |---X---  (don't play)
A major asks three fingers to crowd into the same fret on adjacent strings. Smaller hands feel this one — it’s a real estate problem, not a strength problem. Curl your fingers up onto their tips so they don’t squash flat against each other, and give the high E string room to ring out. Like Am, you skip the low E.
5. D Major — The Triangle, and Your First Targeted Strum
D
e |---2---  (finger 2)
B |---3---  (finger 3)
G |---2---  (finger 1)
D |---0---
A |---X---  (don't play)
E |---X---  (don't play)
D major forms a little triangle on the top three strings, and it’s your first chord where you must avoid the two lowest strings — strum only from the D string down (four strings). Beginners often clip the high E or accidentally hit the muted A; aim your strum deliberately. D major pairs with G and A to play a staggering number of songs.
6. C Major — The First Big Stretch
C
e |---0---
B |---1---  (finger 1)
G |---0---
D |---2---  (finger 2)
A |---3---  (finger 3)
E |---X---  (don't play)
C major is where many beginners hit their first real wall, and I want you to expect it so you don’t take it personally. Your ring finger has to reach all the way to the third fret of the A string while your other fingers stay anchored — a stretch your hand simply hasn’t built yet. It comes. Keep your thumb low on the back of the neck to open up the reach, and give it a couple of weeks of daily reps before you judge yourself.
7. G Major — The Whole-Hand Span
G
e |---3---  (finger 4 / pinky)
B |---0---
G |---0---
D |---0---
A |---2---  (finger 1)
E |---3---  (finger 2)
G major spans the full width of the neck, from the low E string to the high E. There are two common fingerings; the one above (using the pinky) sets you up best for changing to C and D quickly, which is why I teach it even though the pinky feels clumsy at first. This is the chord that develops your pinky, and you’ll thank yourself later. Strum all six strings.
8. D Minor (Dm) — Completing the Toolkit
Dm
e |---1---  (finger 1)
B |---3---  (finger 3)
G |---2---  (finger 2)
D |---0---
A |---X---  (don't play)
E |---X---  (don't play)
Dm rounds out your first set with a darker, more emotional color. Like D major, you play only the top four strings. With these eight chords in hand, you’ve got both the bright (major) and moody (minor) building blocks you need for real songs.
Why These Eight Chords First
Here’s the part almost no beginner guide explains, and it’s the part that makes the rest make sense. These aren’t just “easy” chords — they’re the harmonic backbone of Western popular music.
In the keys most beginner songs are written in — G major, C major, D major, and their relative minors — the chords that appear most often are exactly the ones above. The combination of G, C, D, Em, and Am alone covers the I, IV, V, and the two most common minor chords in those keys, which is the structure underneath an enormous share of pop, folk, country, and classic rock. When you hear that a song is “just four chords,” these are almost always the four. So learning this set isn’t a stepping stone you’ll discard — it’s the foundation you’ll still be standing on years from now.
I sequence them from fewest fingers to widest stretch on purpose, so your hand develops strength and independence gradually instead of all at once. The two-finger minors build confidence, the one-finger additions teach modification over memorization, and the big stretches (C and G) arrive only after your hand has had a couple of weeks to limber up. That’s pedagogy, not accident — and it’s the difference between a beginner who sticks with it and one who quits in week one.
The Most Common Beginner Mistakes (and How to Fix Them)
Every buzzing, muted, frustrating moment in your first month traces back to one of these. Diagnose in order.
- Fingers too flat. Press with the bony tip of each finger, knuckles curled, like you’re standing your fingers up on their points. Flat fingers flop onto neighboring strings and deaden them.
- Fingers in the wrong spot. Place each finger just behind the fret wire (on the side toward the tuners), not on top of the metal and not back in the middle of the fret. Right behind the wire takes the least pressure and rings the cleanest.
- Not enough pressure — at first. Chords need more force than beginners expect, and weak hands fade within minutes in the early weeks. This fixes itself; don’t muscle it so hard you hurt yourself.
- Thumb too high. Keep your thumb resting on the back of the neck, roughly behind your middle finger. A thumb hooked over the top collapses your finger arch and kills your reach on stretchy chords like C and G.
- Strumming the wrong strings. Am, A, C, D, and Dm all require you to avoid one or two low strings. Know your starting string for each chord and aim.
- Blaming yourself when it’s the guitar. If you’ve checked all of the above and chords still buzz and ache, the instrument’s action may be set too high from the factory. A professional setup — a small, one-time cost at any guitar shop — lowers the strings and can transform a fighting-you guitar into an easy one. Don’t skip this; it’s the best small investment a new player can make. The tuners, strings, and care gear in our accessories and care category cover the rest of what keeps a guitar playable.
Your First Chord Changes: The One-Minute Drill
Here’s the truth that reframes everything: the chords themselves are the easy part. The hard part — the part that actually takes time — is switching between them cleanly, without looking, without a long pause. That skill is what separates someone who “knows chords” from someone who can play a song.
The single most effective practice tool I give every student is the one-minute chord change drill:
- Pick two chords (start with Em and Am — the easiest pair).
- Set a timer for sixty seconds.
- Switch back and forth between the two chords as cleanly as you can, strumming once per change.
- Count how many clean changes you make in the minute. Write the number down.
That number is your progress meter. A rank beginner might manage 10 changes in week one; a couple of weeks of daily reps and you’re at 30 or 40. Watching that count climb is far more motivating — and more honest — than vaguely “practicing chords.” Once a pair feels easy, swap in a harder one (Am to C, then G to C, then G to D). The pairs you find hardest are exactly the ones to drill most.
The mental trick that speeds this up: train your fingers to move as a unit, lifting and landing together, rather than placing them one at a time. And look for “anchor” or “pivot” fingers — notes that stay on the same string between two chords. When you change from C to Am, for instance, your index finger barely moves. Spotting those shared notes turns a clumsy reset into a small, efficient shift.
A Simple 4-Week Practice Plan
Fifteen to twenty focused minutes a day beats an hour once a week. Consistency is what builds muscle memory. Here’s a structure that works.
Week 1 — The two-finger foundation. Learn Em, Am, and E major. Spend most of your time on the one-minute drill between Em and Am. Goal: each chord rings cleanly, all intended strings sounding.
Week 2 — Add the stretches. Introduce A major, D major, and Dm. Drill the new pairs: Em→E, A→D, D→Dm. Keep revisiting week 1’s chords so they don’t fade.
Week 3 — The hard two. Tackle C major and G major — the wide ones. Expect these to feel awkward; that’s normal and temporary. Drill G→C and C→D heavily, because that progression appears in countless songs.
Week 4 — Put it together. Now string three and four chords into a loop and strum a real progression in time, like G → C → D or Am → C → G → D. This is the moment it starts to feel like music instead of exercises. Keep a tuner handy — a guitar that’s out of tune makes even perfect chords sound wrong, and our free tools include tuning and chord references you’ll lean on daily.
Songs You Can Play With These Chords
The payoff for the practice plan is that this exact chord set unlocks a huge number of real songs. Many of the most famous songs ever written use only three or four of these chords, often in the same recurring progressions. Once you can change between G, C, D, Em, and Am in time, you can strum along with a remarkable range of:
- Three- and four-chord pop and rock standards built on G–C–D or the I–V–vi–IV progression (G–D–Em–C)
- Folk and singer-songwriter tunes that live almost entirely on Em, Am, C, and G
- Country songs in G and D
- Countless campfire and worship songs designed around exactly these open shapes
Rather than chasing a specific song on day one, I tell students to learn the progressions — G–C–D, and G–D–Em–C — because once those loops are in your hands, dozens of songs are suddenly within reach with only small adjustments. The chords are the keys; the progressions are the doors.
What Comes After the Open Chords
Once these eight feel comfortable and your changes are smooth, three doors open next, in roughly this order:
- The F major barre chord — your first movable shape, where one finger presses all six strings. It’s the gateway to playing in any key, and it’s the right next challenge once your hand has the strength the open chords built.
- Sus and add chords — small one-finger variations (Dsus4, Cadd9, Asus2) that add color and, conveniently, often make changes easier by sharing fingers with their parent chords.
- Power chords — the two-finger movable shape behind rock and punk, especially fun on an electric guitar.
- Your first scale — once chords feel natural, the minor pentatonic is the classic next step into lead playing and improvising. Our free interactive guitar scales chart shows every scale in any key right on the fretboard, with note names or degrees and a printable PDF.
But none of that matters until the foundation is solid. Spend your time on the eight open chords and your chord changes, and everything after them gets dramatically easier. If you’re still setting up your first rig to practice on, our review of the best beginner electric guitars walks through what makes an instrument easy to learn on — and an easy guitar, properly set up, is the most underrated accelerator a beginner has. Browse the full guitars category to compare your options, and get playing. The chords are waiting.
Frequently Asked Questions
What are the first guitar chords a beginner should learn?
How long does it take to learn basic guitar chords?
Why do my guitar chords sound buzzy or muted?
What is the easiest guitar chord for beginners?
Do I need to learn barre chords as a beginner?
Should I learn chords on an acoustic or electric guitar?
Related Articles
About the Reviewer

Julian Reyes, MM, Berklee
M.M. Performance, Berklee College of Music
Julian Reyes is a multi-instrumentalist with a Master of Music from Berklee College of Music and over a decade gigging on guitar, bass, and keys. Before founding House of Octave, he spent years as a gear buyer for an independent music retailer, evaluating hundreds of instruments and audio products for the sales floor. He started House of Octave in 2026 to give players honest, hands-on reviews — judged by how gear actually sounds and holds up on stage and in the studio, not by spec sheets or sponsorships.